📖 User Guide
This user Guide is updated regularly. It allows you to enter in the details to learn how to use the editor.
|
📄 View manual in PDF format Listen in voice mode :  ActorsLast update : October 01, 2026🪸 DecalsDecals allow you to add details to your character's clothing or add tattoos, for example. 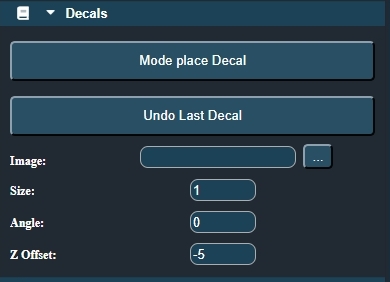
Start by selecting the image and dragging it into the field as shown in the following example: 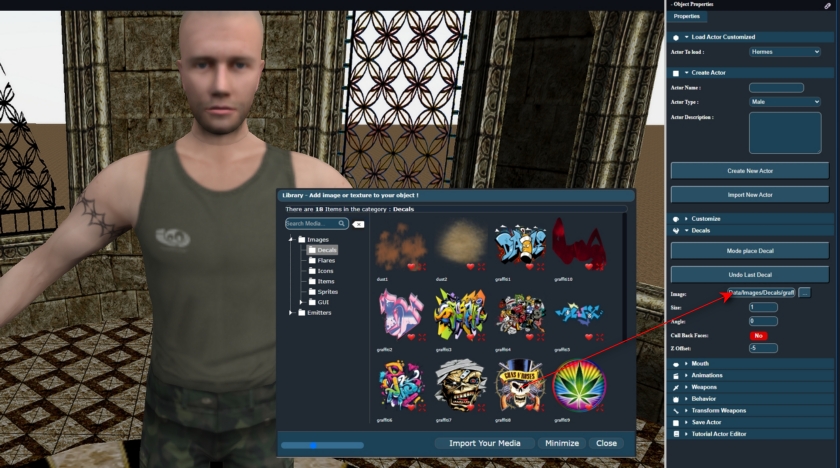 Once your image has been added and "Mode Place Decal" is enabled, you can move the mouse cursor over the character to preview how your decal will look. 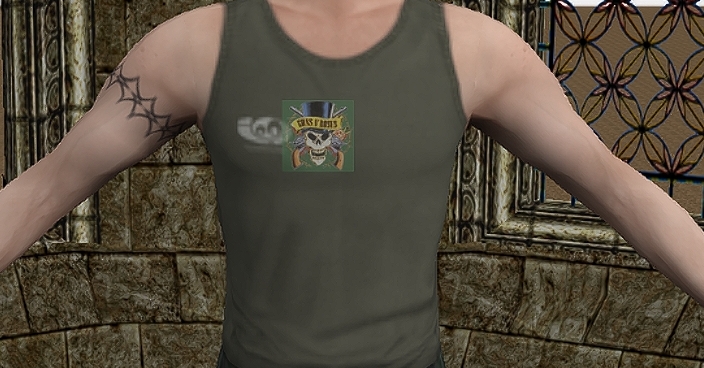 Once you are satisfied with the decal's position, size and angle (the default Z-offset is usually fine), simply click to place the decal. 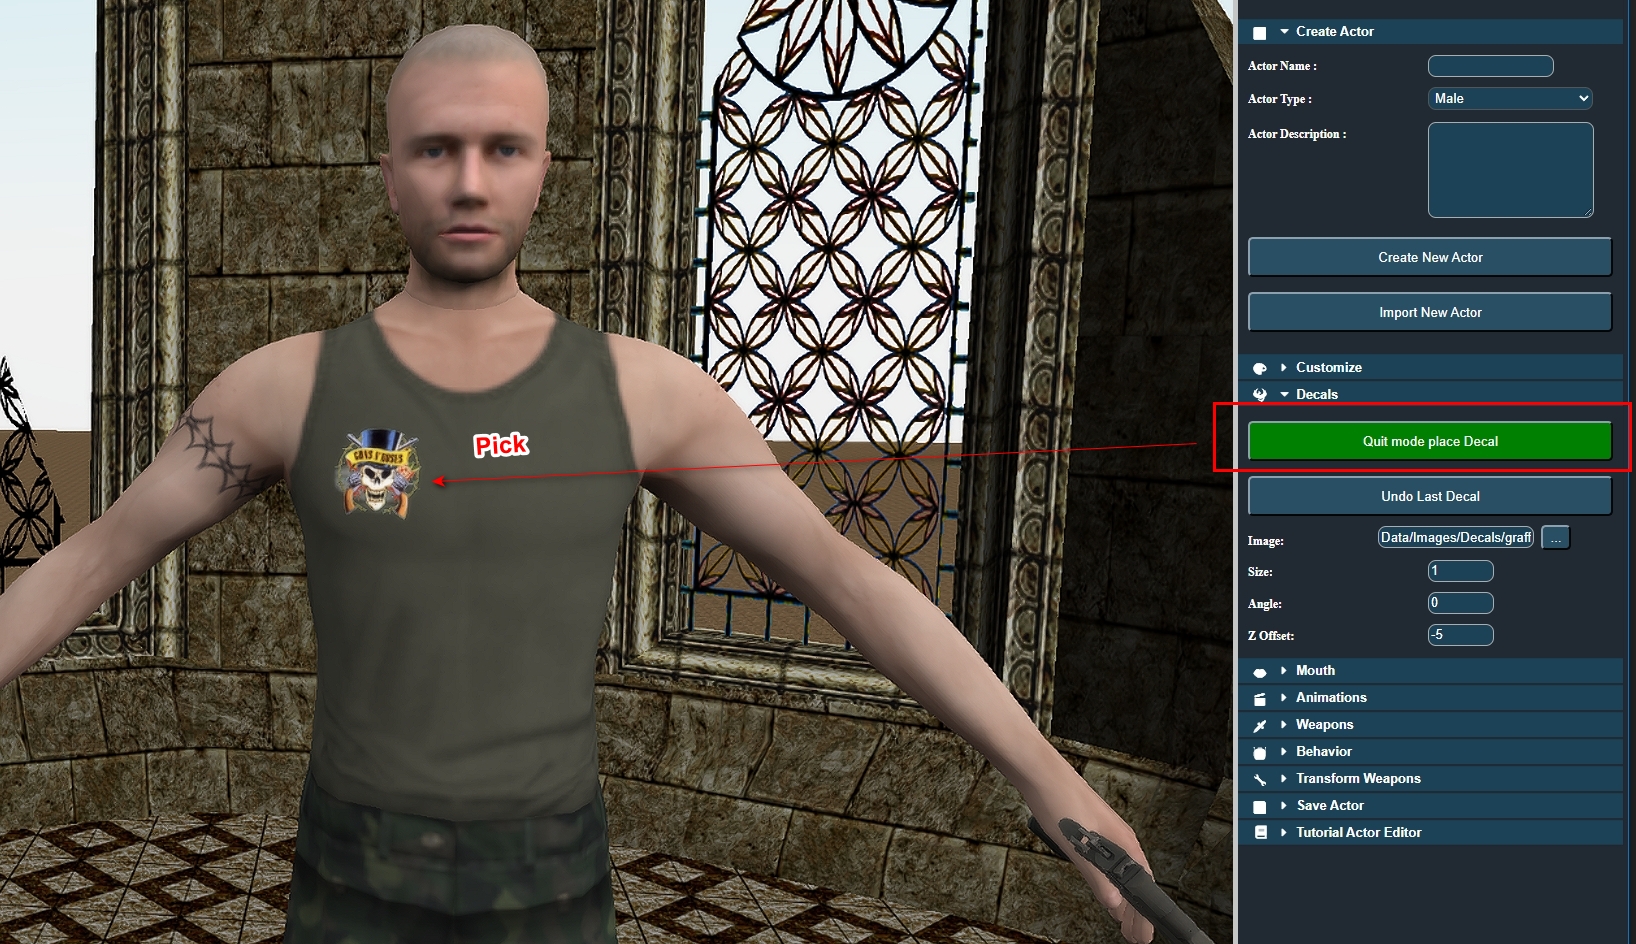 You can change the image of a placed decal at any time. If you want to add several decals to a character, simply move the cursor to another location and click again to place another decal, then modify its properties if needed. You can therefore have several different decals on the same character. |