📖 User Guide
This user Guide is updated regularly. It allows you to enter in the details to learn how to use the editor.
|
📄 View manual in PDF format Listen in voice mode :  CinematicLast update : January 06, 2026🔗 Create keysNow that your track is created, animating the camera is actually quite simple. However, you need to be methodical. 🧭The first essential keyframe is the starting one (keyframe at time 0). Move the timeline cursor to 0 on the timeline. Position the camera where you want the cinematic to start, and then create your first keyframe. 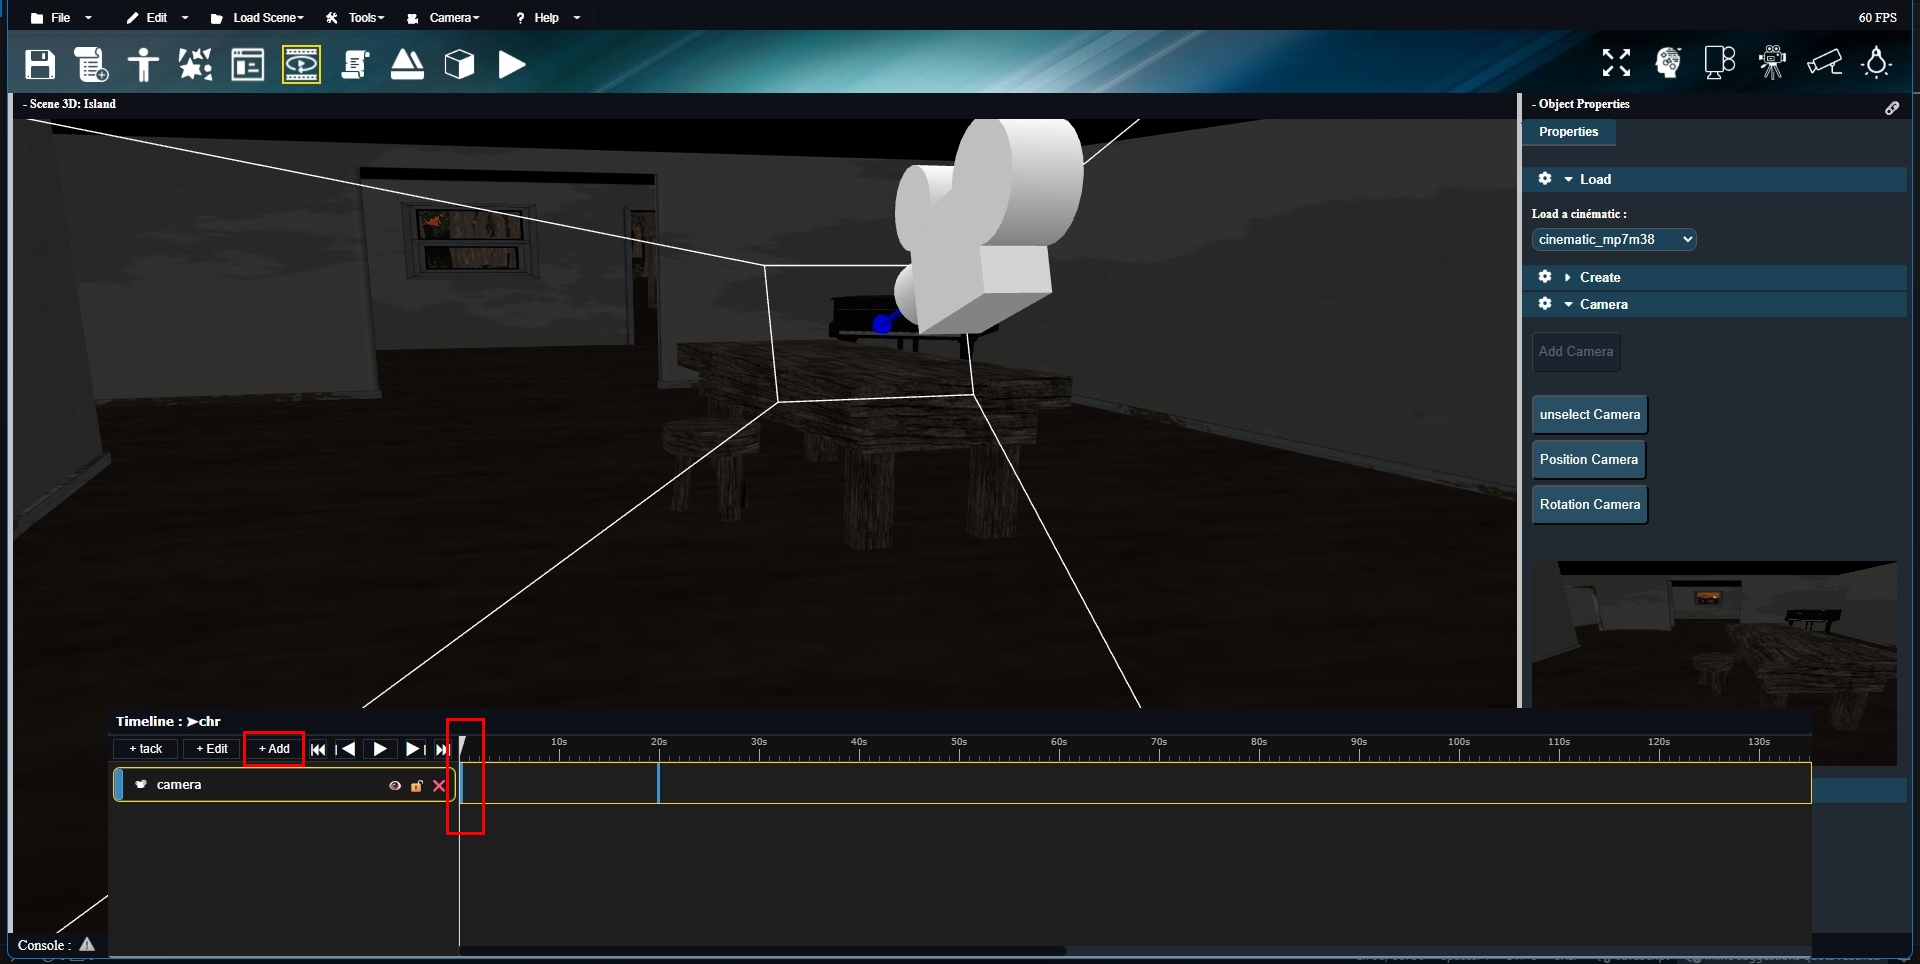
For the second keyframe, move the timeline cursor to another point, such as 5 or 10 seconds, depending on what you want to achieve (everything is expressed in seconds). You can also move the camera first — the order does not matter. So, if you move the camera somewhere else and possibly rotate it, make sure the timeline cursor is positioned at the desired time. The longer the duration, the slower the animation will be. If you place the camera at 2 seconds and move it from one side of a room to the other, the animation will be very fast. Don’t worry — you can always adjust everything later. 😊 Once the camera is positioned, add a new keyframe: 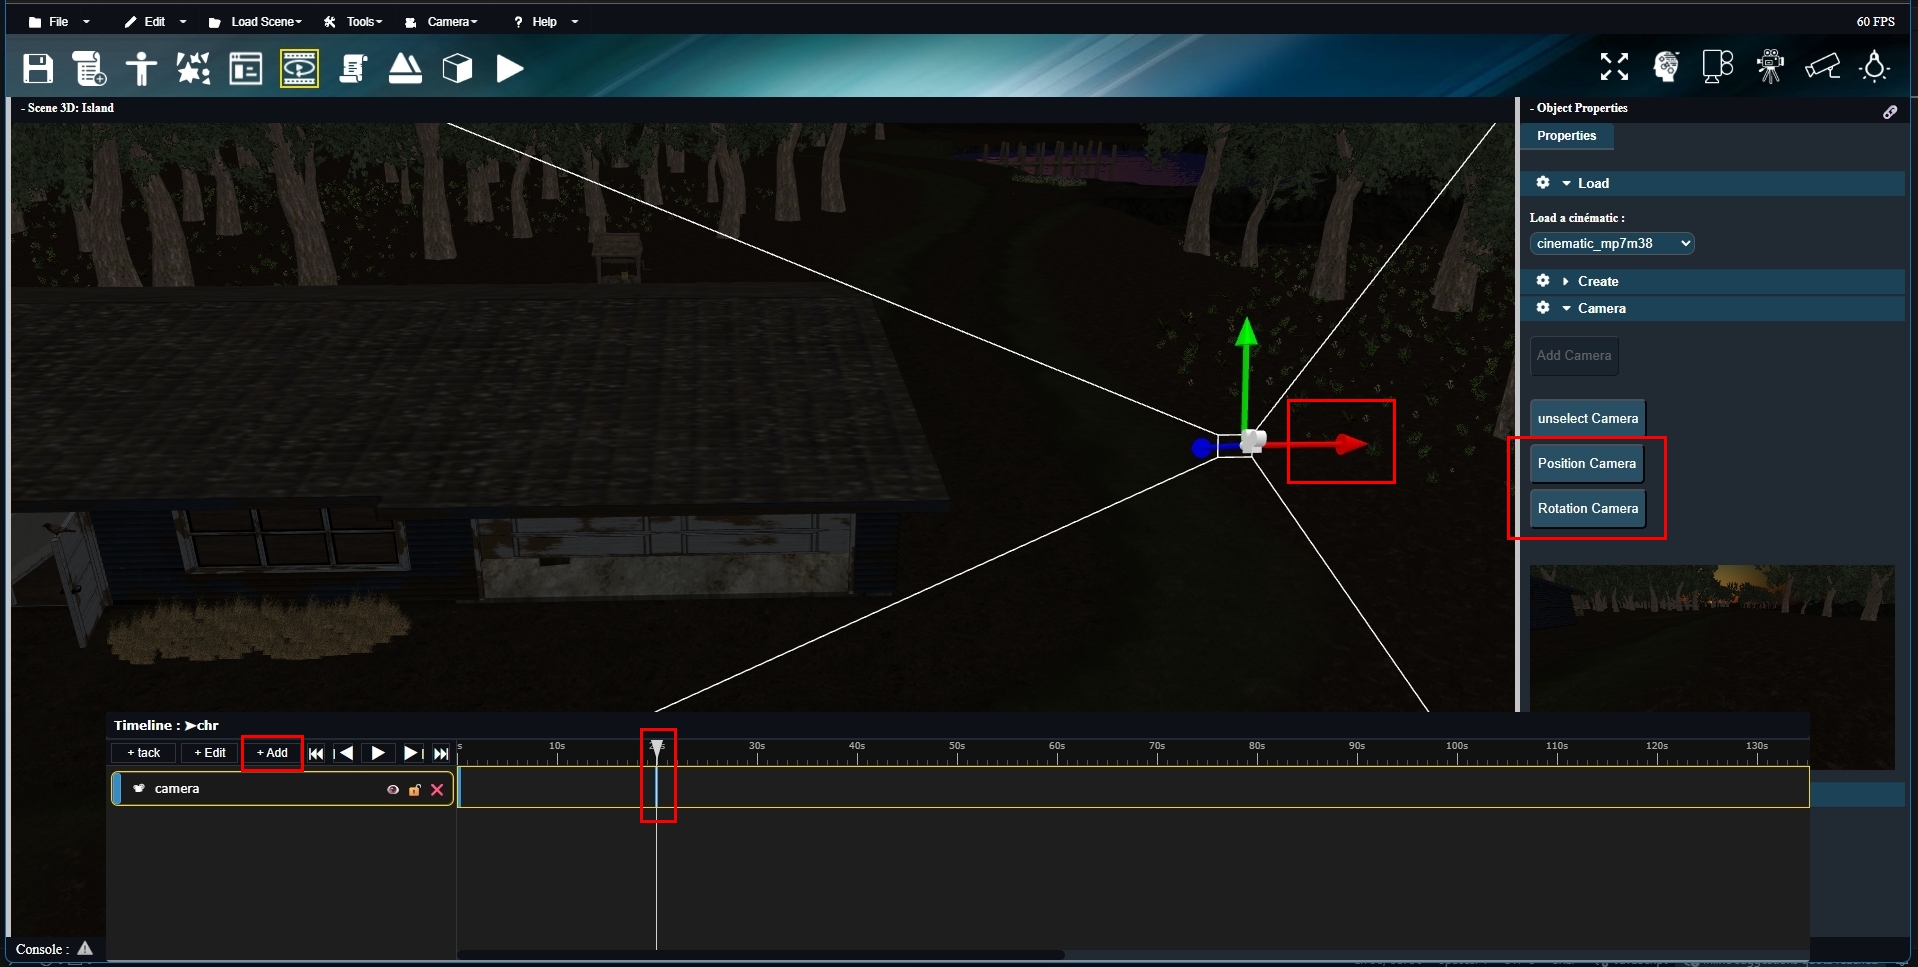
You now have your first animation. You can add as many keyframes as you want — you are not limited to just two. This is only a simple example to explain the principle. Now let’s imagine you want to edit a keyframe. The process is almost the same. First, you need to select the keyframe you want to edit. You have two options: – You can move the keyframe directly by drag and drop on the timeline. – Or you can leave the keyframe where it is, move and rotate the camera, and then update the keyframe. Instead of clicking on “Add key” (the “Add” button), click on “Edit key” (the “Edit” button). That’s all there is to it. ✔️ At any time, you can move the timeline cursor to preview the animation, or press Play to play the cinematic. You will see the result in real time in the preview window. 🎬 Don’t forget to save your work once you are satisfied. Saved cinematics can be reloaded later from the Load menu in the right-hand panel. So far, you have seen what you can do with a camera. Keep in mind that for other types of animations, the workflow is very similar. The main difference is with sounds, for example: they do not use transformation keyframes, but rather “Play” and “Stop” actions triggered at specific times on the timeline. In practice, only the camera really needs to start at time 0. 🎵 One more thing: you can also clone keyframes. By selecting a keyframe and holding SHIFT while dragging it, a copy of the selected keyframe will be created. You can also use CTRL + C and CTRL + V to copy and paste a keyframe. Copied keyframes usually need to be edited afterward. Copying a keyframe mainly allows you to create a new keyframe later in time while keeping the same position and rotation (for the camera or any other track). And finally, when you have multiple tracks, always make sure the correct track (camera, actor, etc.) is selected before editing. These small details are easy to forget but very important. ⚠️ That’s it — we’ve covered everything. If there are still things you don’t fully understand, feel free to let me know on the forum and I will update this manual accordingly. 😊 |