📖 User Guide
This user Guide is updated regularly. It allows you to enter in the details to learn how to use the editor.
|
📄 View manual in PDF format Listen in voice mode :  CinematicLast update : January 06, 2026🔗 Create a trackOnce the timeline is displayed and linked to an object, you can start creating animations. But before anything else, you need a camera. 🎥The camera is what will be used to view the cinematic in the game. When a cinematic is triggered, the camera normally used behind the player will switch to the cinematic camera viewpoint. This is why creating a camera is always the first step. To clearly understand the entire process from the beginning, follow the numbered steps shown in the image below, in order: 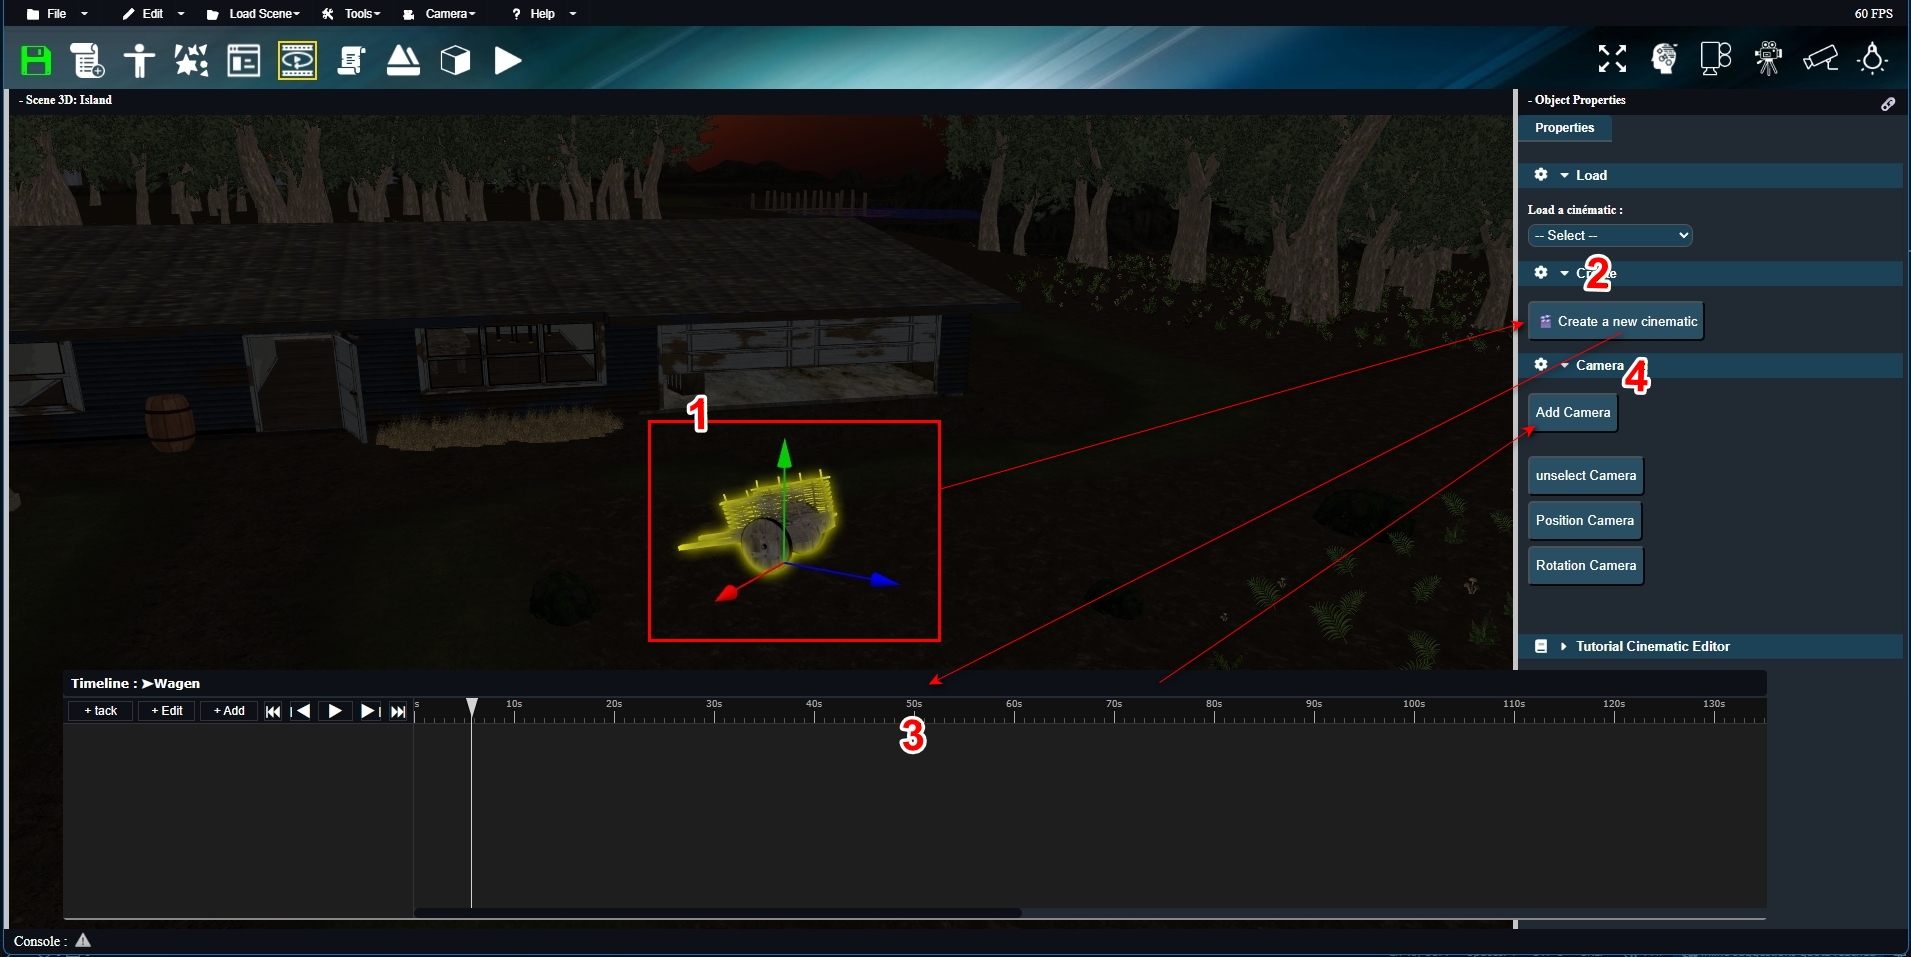
As you can see, the first four steps are: select an object → create a cinematic → display the timeline → the “Add Camera” button becomes available. When you click the “Add Camera” button, you reach step 5: 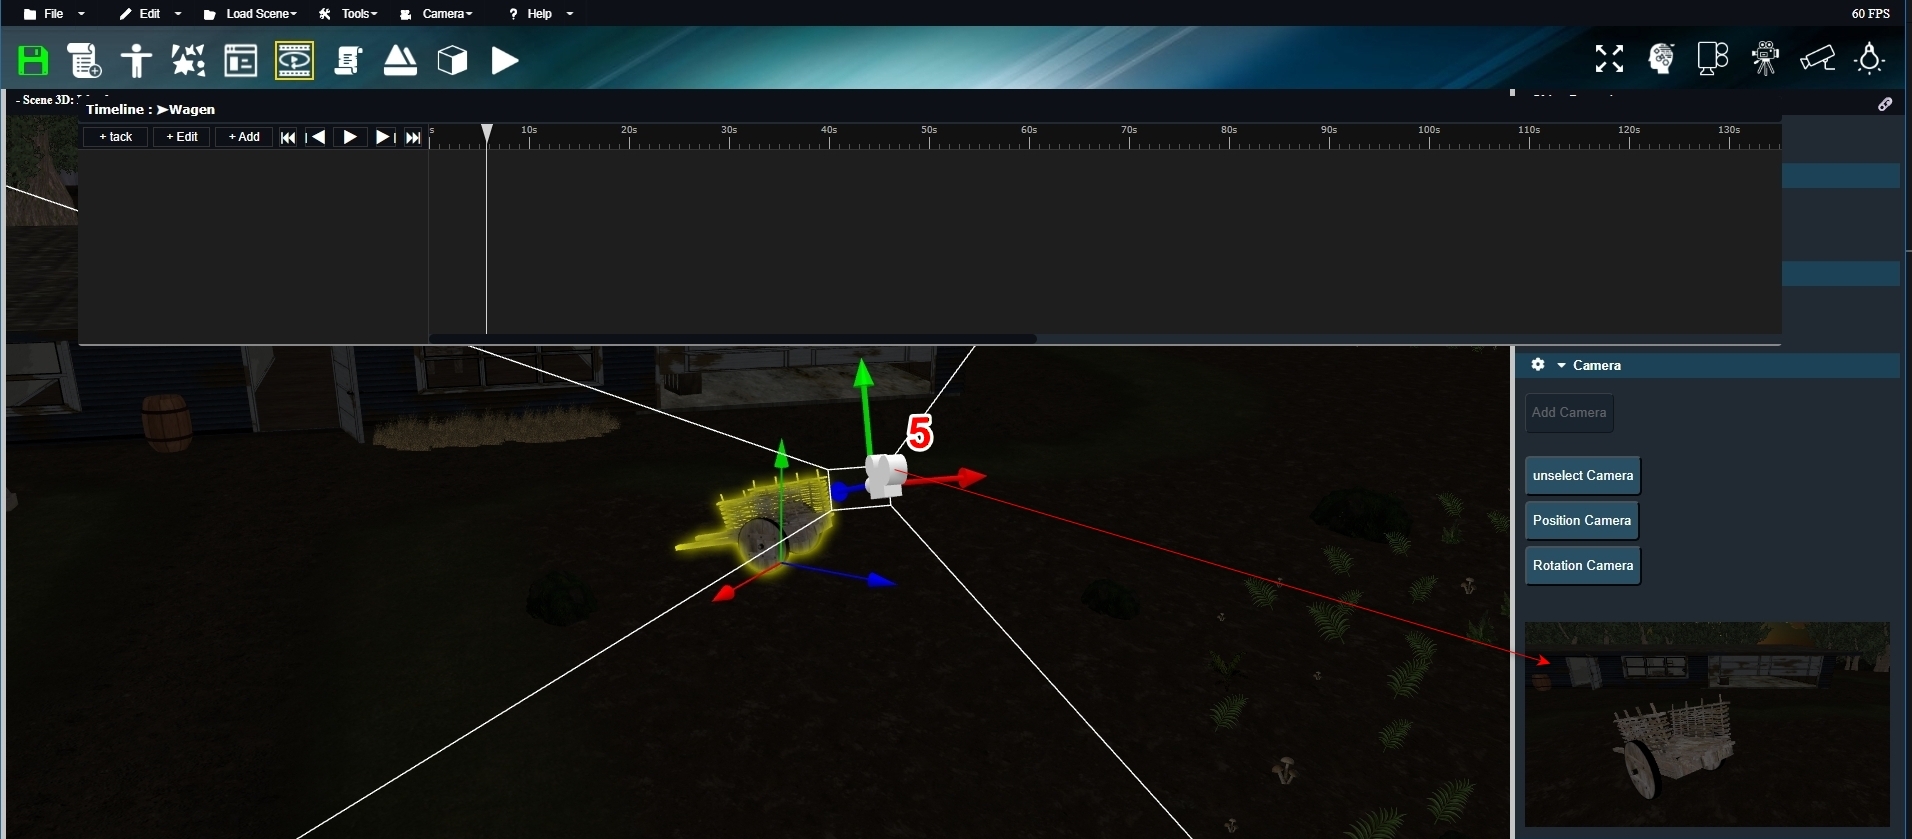
As shown in the image, a camera is added to the scene with a gizmo, allowing you to clearly see where the camera is and move it around. A live preview also appears in the side panel, showing exactly what this camera sees in real time. If the camera is moved, the preview updates immediately. 👁️ Next, to animate the selected camera, you need to add a Camera track. The camera must be selected in order to add a Camera track. This links the camera to the timeline so it can later be animated using transformation keys. We will see how to do this in the next chapter. To add a track, go to the Track menu on the far left of the timeline and select Camera: 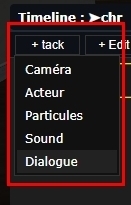
This adds a new track line, which corresponds to step 6: 
Once this track is added and linked to the camera, you can start adding keyframes to animate it. This is exactly what we will explore in the next chapter. 🚀 |