📖 User Guide
This user Guide is updated regularly. It allows you to enter in the details to learn how to use the editor.
|
📄 View manual in PDF format Listen in voice mode :  LevelLast update : August 10, 2025Property🧩 The properties in the right panel are grouped by category into expandable sub-panels. They automatically appear as soon as you select an object in the scene, allowing you to modify its appearance or behavior in the game. Here’s what the panel looks like when all groups are collapsed: 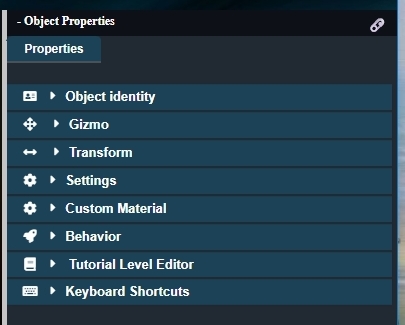
🔍 Let’s explore each panel one by one to better understand their purpose: 📛 Object IdentityThis panel displays the identity of the selected mesh. It provides essential information to reference the object in configurable scripts using its name or its ID. 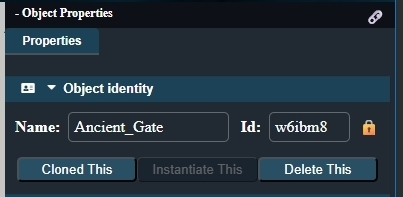
🔒 A lock icon may appear next to the ID: this means the object is locked. It can no longer be moved or transformed in the scene, but its properties remain editable. 📎 Below are three buttons for quick actions:
🧭 GizmoThis panel lets you manipulate the selected object using the Gizmo, a visual tool to move, rotate, or scale the object. 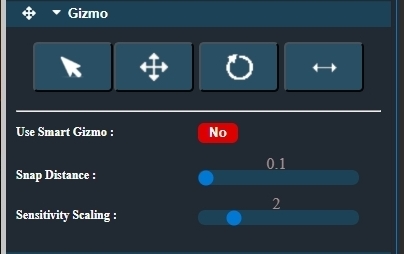
🔧 Additional properties:
🧱 TransformThis panel allows precise adjustments of the object’s transformations: position, rotation, and scale. It complements manual Gizmo manipulations by offering greater accuracy. 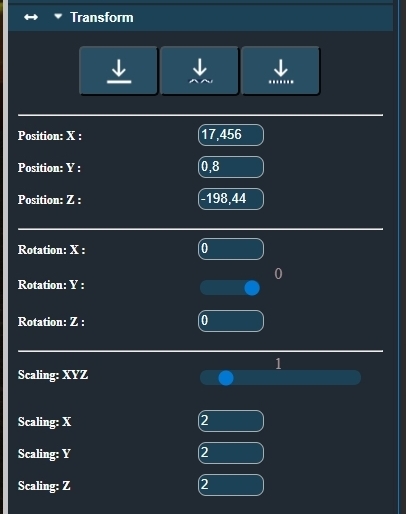
🔹 The first three buttons offer shortcuts to reposition the object:
Then come the fields for each axis (X, Y, Z) for:
These concepts are also explained in the dedicated Editor chapter. ⚙️ SettingsThis panel is probably the most useful one, as it defines the core logic and behavior of the selected object. 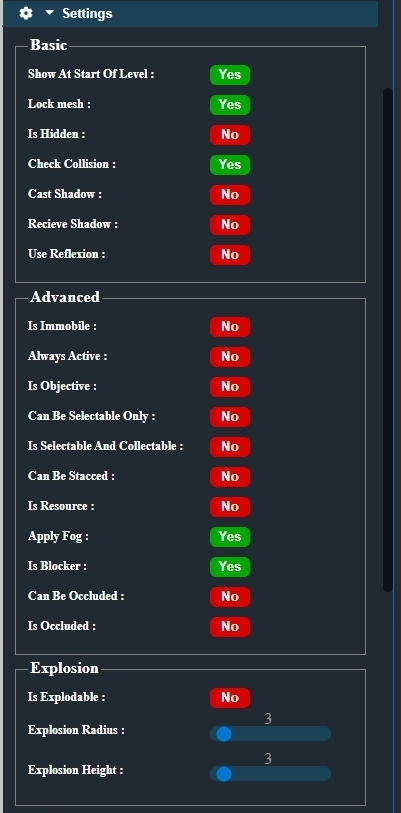 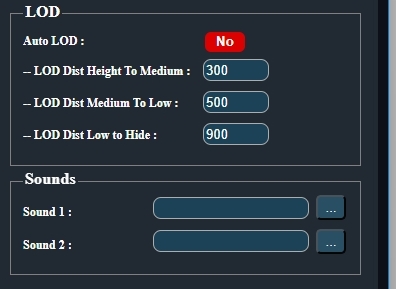 As you can see, the panel is organized into several categories: basic options, advanced logic, explosion settings, LOD (Level of Detail), and sound settings. Not all properties need to be changed — some are already enabled or disabled by default. Let’s go through each group of properties to understand what they do. Some are crucial for the proper behavior of objects.
🎨 Custom MaterialThis panel allows you to adjust some basic material settings of the object. If the object has multiple sub-materials, they will be displayed as tabs. 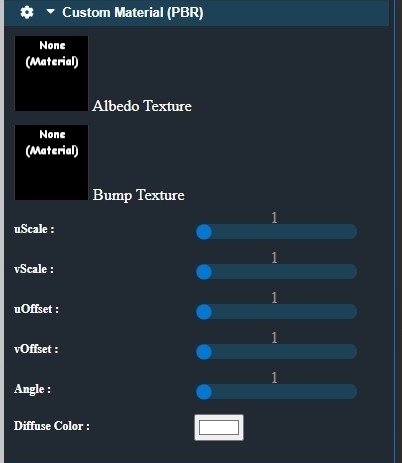 You can change the diffuse and bump textures here if needed. Usually, these are already set in your 3D modeling software, so the textures mainly help identify what part you’re editing. Sometimes, you'll want to repeat a texture on an object using the Example: However, this panel won't be useful in all cases. It's generally better to modify your materials directly in your 3D software. Use this panel only when necessary, such as in the situation described above. 🛠️ BehaviorThis panel is quite special. It allows you to add a behavior to an object by dragging and dropping predefined scripts into the rectangular area labeled "None Behavior". 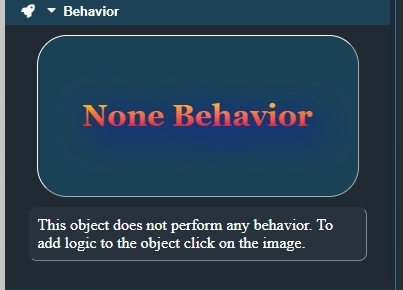
A behavior means the object does something special in response to an interaction, either when connected to a trigger or when the game loads. In other words, a behavior script gives the object a specific role or way to react. How to add a behavior script? You don’t need to write any code yourself—unless you want to! Realm-Crafting provides a large library of pre-made scripts covering many possibilities. To add a behavior, just click inside the rectangular area that says "None Behavior". This will open the behavior library (covered in the Library chapter). Once you’ve selected a script, simply drag it into the same area where you clicked to open the library. When the script is added, the label "None Behavior" is replaced by the name of the script you added, and options for the script appear below. These options let you customize how the behavior acts. Still no coding required! All scripts have configurable options specific to their purpose. Some scripts work perfectly on their own without any parameters to adjust. Most have default settings that you can tweak as you see fit. Understanding what each property does is usually straightforward. Here are the different zones of this panel: 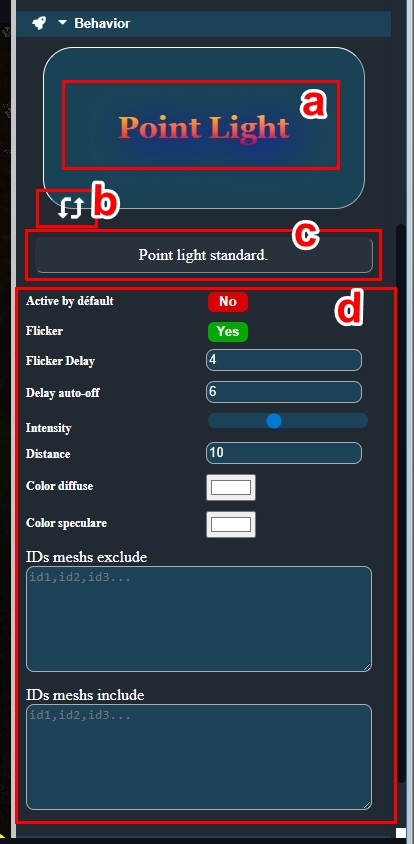
It's impossible to cover every option for every behavior script here, but I try to add tooltips explaining what each option does. And of course, there’s the forum for help if you get stuck. Don’t hesitate to experiment in test projects! 🎥 Tutorial Level EditorEach editor has this tutorial panel, which you can disable in the editor options under This panel contains several short video tutorials that quickly explain key concepts, showing you how to do things live. The tutorials change depending on which editor you’re in. The example here is for the Level Editor, but for example, in the Terrain Editor, you’ll find tutorials specific to terrain editing instead. ⌨️ Keyboard ShortcutsLike the tutorials panel, this one changes depending on the editor you are using. It simply lists all keyboard shortcuts you can use to speed up your workflow. There are some shortcuts you'll definitely want to memorize—they will save you a lot of time and hassle. This panel gives you quick access to all those shortcuts. And just like the tutorials, you can disable this panel via the editor options in 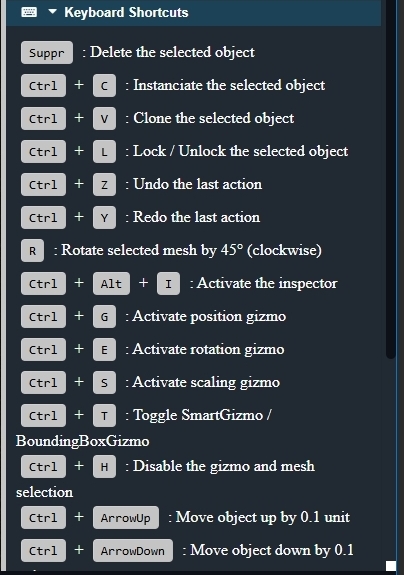
|