📖 User Guide
This user Guide is updated regularly. It allows you to enter in the details to learn how to use the editor.
|
📄 View manual in PDF format Listen in voice mode :  LevelLast update : August 10, 2025WeatherThe Weather tab allows you to define the climate in your level or scene. 🌤️🌧️⛈️❄️ Do you want a calm sunny day, a rainy atmosphere, or even a stormy environment? This tab is simple and quick to configure. You can open it using the cloud-shaped icon in the toolbar. See the image below showing the available settings: 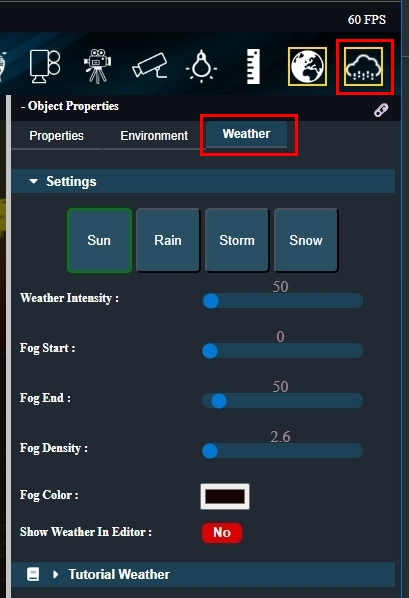
At the top, there are four buttons to choose the type of weather you want:
Below these options, you'll find some additional settings to fine-tune the chosen weather effect:
Note: This preview has no impact on gameplay. In the game, the chosen weather type will always be active. This option is for visual convenience while building your level. And that’s pretty much it for the weather settings! Most of the heavy lifting is done behind the scenes. You don't need to manually create particle systems to simulate rain, snow, or storm effects — they’re already set up by default. Of course, if you want to customize these further, feel free to tweak them using the Particle Editor to refine the weather visuals. ⚙️ |