📖 User Guide
This user Guide is updated regularly. It allows you to enter in the details to learn how to use the editor.
|
📄 View manual in PDF format Listen in voice mode :  ParticlesLast update : January 05, 2026🔗 Create a particle systemThe Particle Editor allows you to create two types of systems: "Simple emitter" and "Multi-emitter". What is the difference between them?A Simple emitter is a single point that emits one type of particles. A Multi-emitter creates multiple emission points to emit different particles and form a complete system. Let’s take an example: A fire effect. You have the main flame, to which you add small bursts caused by crackling, smoke, and more… In this case, you have three emitters that together form a more advanced particle system. 🔥🌫️ However, there is an important thing to know about multi-emitters. They are handled by the CPU (processor) and not by the GPU (graphics card). Only Simple emitters are GPU-based. GPU particles allow a much larger number of particles to be emitted with minimal performance impact, while multi-emitters are more demanding in terms of resources. ⚠️ Particles should therefore be used wisely and only when they are truly useful. This does not mean that you should avoid them entirely. Particle effects can play for a limited time and then disappear, making their performance cost temporary. The key idea is to avoid running too many complex particle systems at the same time in-game. Remember: particles are meant to simulate special effects, not to create ultra-complex, hyper-realistic visuals. 🎨 Alright, I won’t overwhelm you with more explanations here. I assume you now understand the difference between a "Simple emitter" and a "Multi-emitter". To create a particle system, simply choose one of these two buttons: 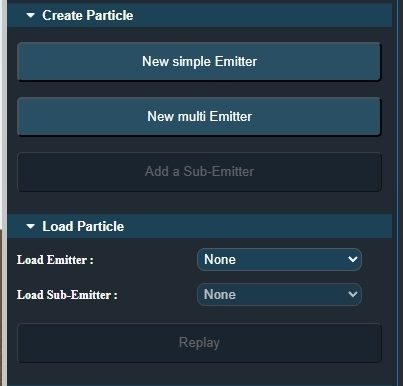
Note that when you create a multi-emitter, an additional button below becomes available, allowing you to add as many sub-emitters as you need. These sub-emitters will then appear in the "Load particles" panel, under the "Load sub-Emitter" menu, allowing you to switch between sub-emitters and configure each one independently. Later, you can always return to your saved particle systems using the "Load particles" panel. This panel contains two dropdown menus. The first one loads the particle system (simple or multi). If the loaded system is a multi-emitter, all sub-emitters will automatically appear in the "Load sub-Emitter" menu. Below these two dropdown menus, you will find the "Replay" button. This allows you to replay the loaded animation, either for the entire system or for individual sub-emitters. 🔁 Once your first particle system has been created, you will need to configure it to achieve the effect you are looking for. In the next chapter, we will go through this step by step. |