📖 User Guide
This user Guide is updated regularly. It allows you to enter in the details to learn how to use the editor.
|
📄 View manual in PDF format Listen in voice mode :  ScriptsLast update: January 07, 2026🔗 Create a new scriptLet’s start with the toolbar located above the script list: 🛠️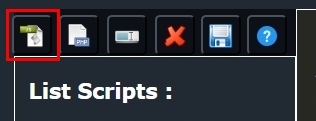
- The first icon allows you to create a JavaScript script. Behavior scripts use this language. 💻 - The second icon allows you to create PHP scripts. This is useful for reading, writing, or saving text, JSON, HTML files, etc. We will cover this later. 📄 - The third icon allows you to rename a script. Only rename your own scripts, not the default ones. ✏️ - The fourth icon allows you to delete a script. Do not delete existing default scripts, as they will be restored with every Realm-Crafting update. ❌ - The fifth icon allows you to save your script, whether it is JavaScript or PHP. 💾 - The sixth icon opens the behavior script manual, where you can discover the available functions along with their descriptions. 📖 To begin, we will create a JavaScript script by clicking the first icon. By default, you will get something like this: As you can see, your script already contains the main functions by default, along with comments explaining their purpose. ✨ Here is what you should remember for now: The first line of the script: This line is mandatory for all scripts. It helps the code editor work correctly. ✅ Next, the class declaration: All behavior scripts extend the Behaviors class. It connects the script to objects, the editor, and the game, and provides ready-to-use features. 💡 The main functions:constructor(object): initialize your variables here. Do not call functions inside the constructor. 🏗️init(): called only by the editor to add configurable properties.
Use addConfig()to create interactive fields. ⚙️Example of addConfig():start(): called when the game starts. It allows you to initialize variables or objects at load time. 🚀trigger(event): called when an event occurs (for example: the player enters a zone). 🎯execute(): executes the defined behavior (often called from trigger()). 🔄BEHAVIOR.register("className", className);: registers the script using its name. 🏷️💡 Note: not all default functions are mandatory. - If a script has no properties, init()can be removed.- If the behavior can be fully handled in start()then trigger()and execute()may be omitted.The editor is flexible and does not force you into a single way of coding. You only need to understand the purpose of each function. 🔑 We have now seen the basic structure of a script and the role of the main functions. In the next chapter, we will look at how to fill these functions step by step. 🚀 |