📖 User Guide
This user Guide is updated regularly. It allows you to enter in the details to learn how to use the editor.
|
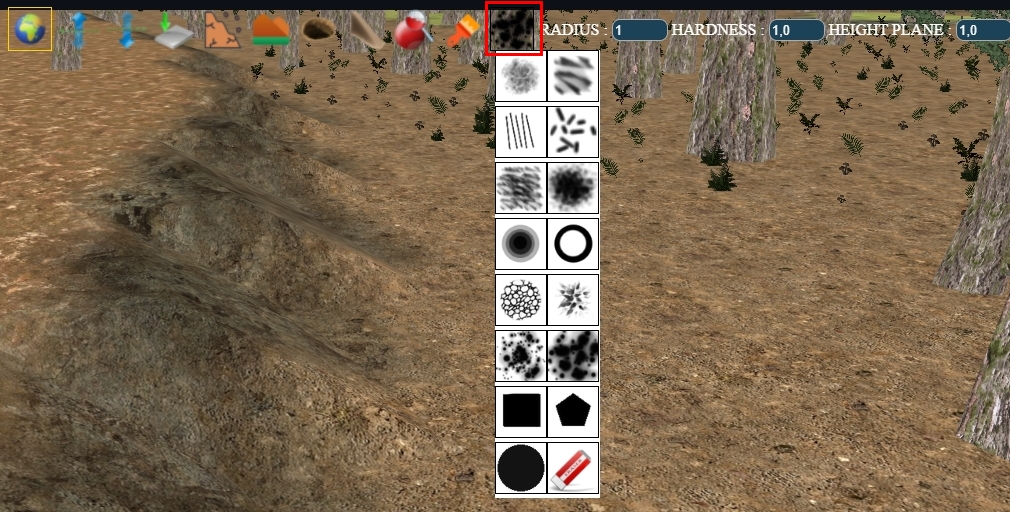
📄 View manual in PDF format Listen in voice mode :  TerrainLast update : February 10, 2026🎨 Texture PaintingTexture painting brings consistency to your terrain. It lets you draw paths, define terrain areas, and basically paint a picture—but in 3D! 🖌️🌍 To activate the painting tool, select a brush and a brush type as shown below:
Brush types appear just below the main brush icons:
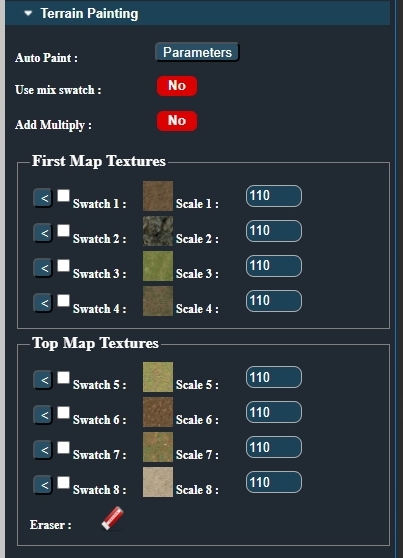
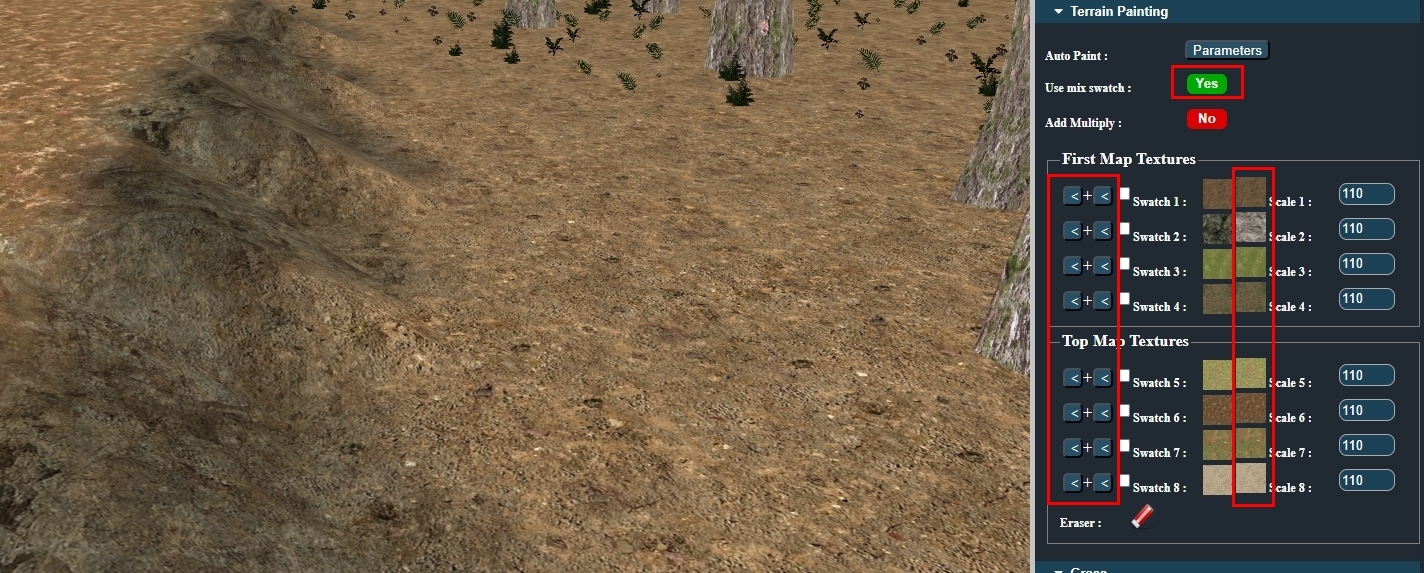
Now, open the Terrain Painting panel to access your available textures:
🧩 Understanding the InterfaceThis panel may seem complex at first, but don’t worry—it’s easier than it looks!
Below that, you’ll find two groups: First Map Texture and Top Map Texture. Each has 4 texture slots. 🧠 How Does It Work?
Each map ("First" and "Top") is actually a MixMap that uses the color channels When you paint, you’re not painting a texture directly—you're painting a color onto the MixMap, and that color is linked to a texture. Simple! 🎨 📌 Painting Workflow
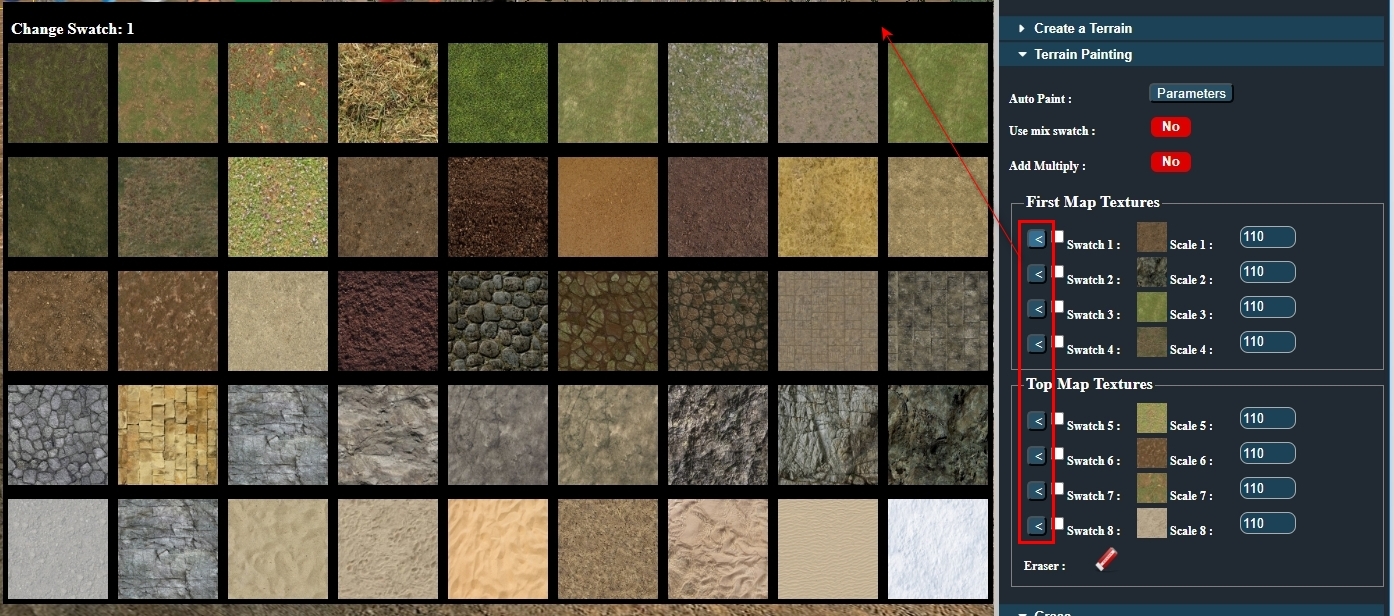
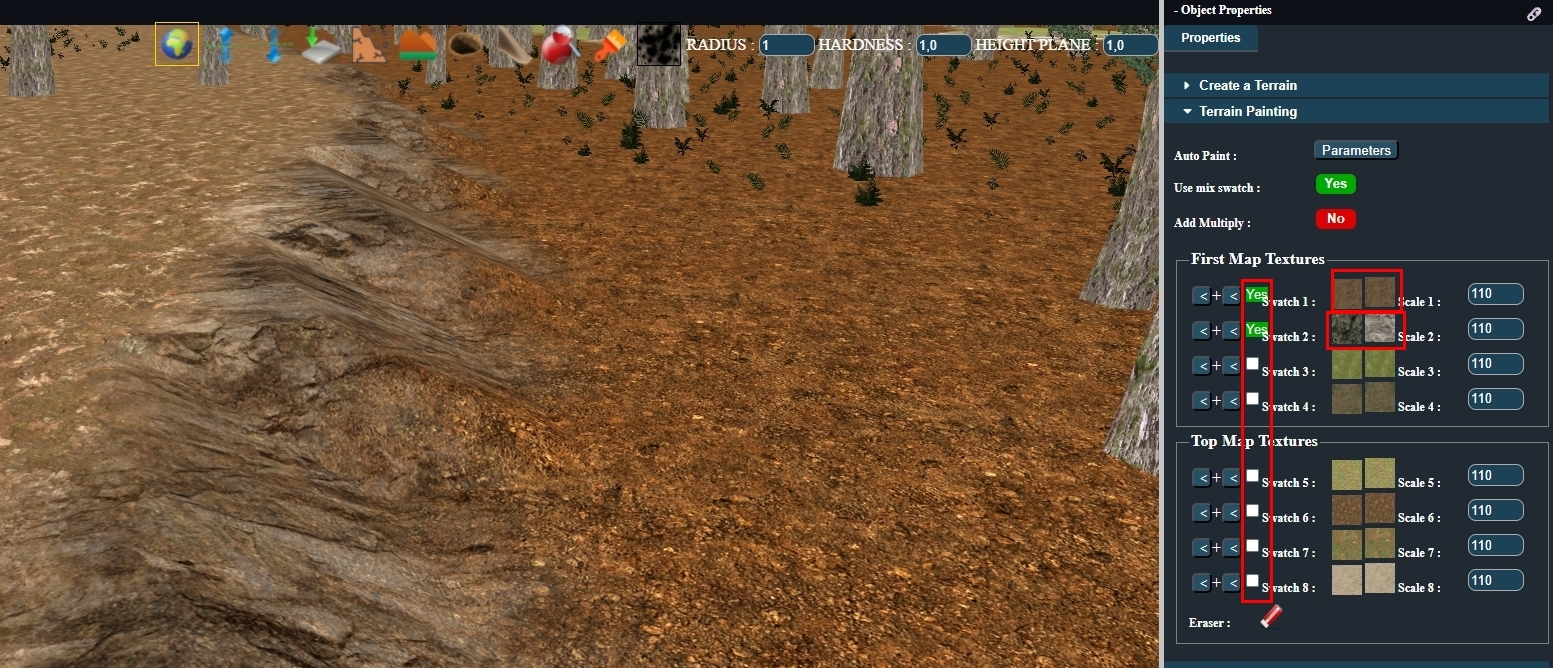
🧱 Selecting TexturesClick on the arrow buttons to open the texture palette and choose a diffuse texture:
Hovering over a slot will show a preview of the texture:
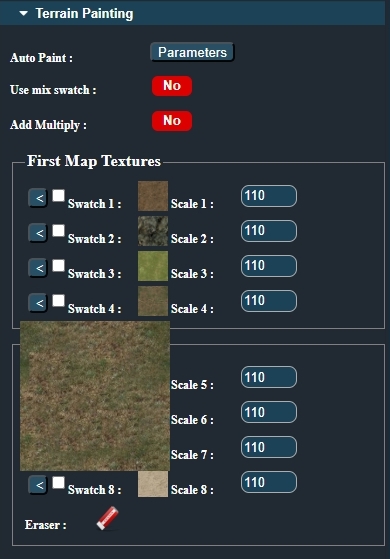
Once your painting tool is selected, you can paint directly onto the terrain. You can also control brush hardness to create soft blends or sharp edges between textures. 🔁 Texture ScalingEach texture slot includes a scale setting, which lets you control how often the texture repeats. Use this to adjust detail density—great for fine dirt, grass, or gravel! 🌾 🧪 Texture Blending (Mix Swatch)Enable Use mix swatch to unlock texture blending options:
Each texture slot now allows two textures to be fused into one. For example, you could blend soil and grass to create a transition zone between paths and meadows. To activate blending for a texture, check the box between the arrow and the texture:
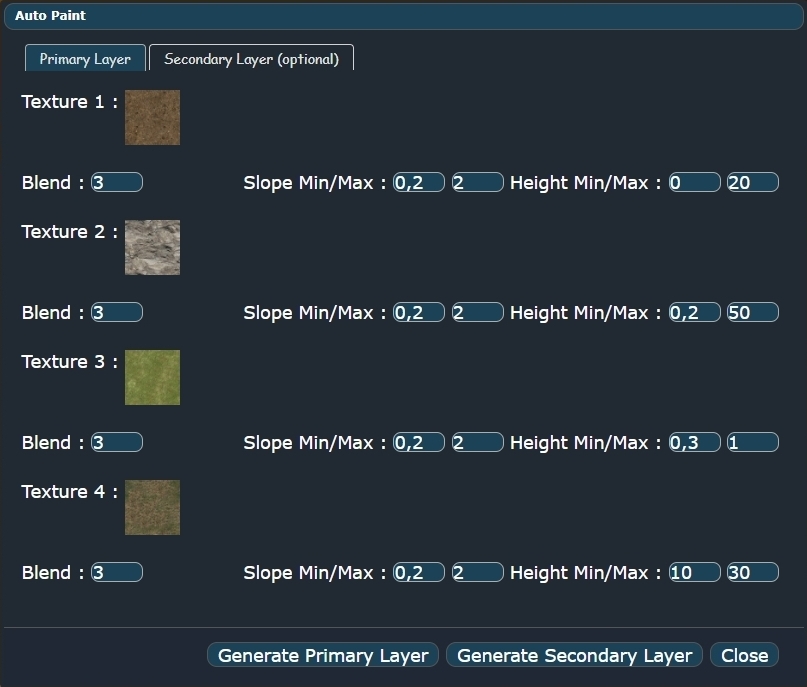
You can toggle blending on or off anytime. When off, only the first texture is visible. The Add multiply checkbox increases the contrast of the blend. It’s optional and rarely needed, but can produce interesting effects when used correctly. ⚙️ Auto-TexturingThe Auto-texture button generates terrain painting based on elevation and slope. It’s a powerful way to kickstart your terrain design! 🗺️ Clicking the button opens this panel:
🧠 How It Works
Each texture has 3 parameters:
This requires trial and error: adjust, generate, observe, and repeat. But even imperfect results save tons of time compared to fully manual painting. You can always touch up manually afterward. Start by generating Layer 1. Layer 2 is optional, and requires additional tweaks for proper blending. Auto-texture is extremely powerful but admittedly a bit tricky at first. I might redesign this system in the future to make it more intuitive. But for now, it’s a major time saver when used well! 🚀 |